I have a new appreciation for all those wonderful women who photograph and post tutorials now...this really isn't easy! Anyway, I promised a tutorial on the paper shaping technique I used to create my big blossom flower, and here it is! Sick kid and all. (Don't worry, she's not that sick, just a slight fever to keep her home instead of at kindergarten!)
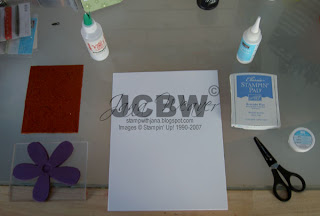
1. Gather your supplies. To complete this project you will need whisper white (or Very Vanilla) cardstock, your stamp(s) of choice (flowers, butterflies, anything you want to add dimension to!) ink, white glue, crystal effects, glitter (optional) and scissors.
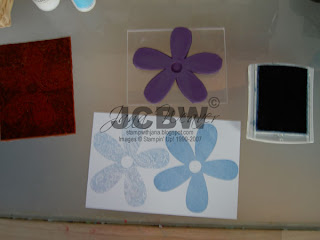
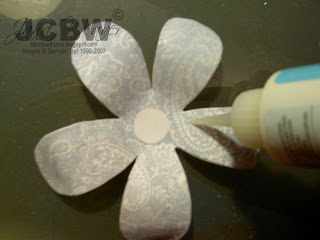
2. Stamp your images. I used Big Blossom and kissed one of them to Paisley using Brocade Blue ink (I was hoping to get a china cup look to my blossom)
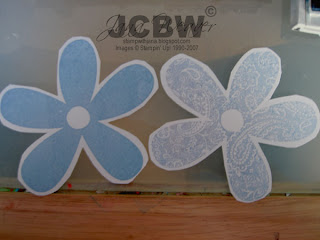
3. Cut your images out. At this point, you shouldn't cut right up to the edge, and it doesn't need to be perfect...you will be cutting them out again!
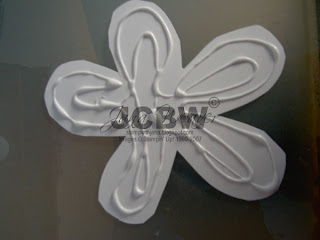
4. Apply a liberal amount of glue to the back of your stamped image...but be careful as it is possible to have too much!
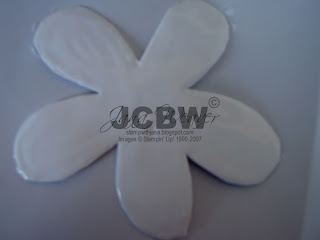
5. Spread the glue around so that it completely covers the paper, all the way to the edges. I prefer to use my finger, but you can use the tip of the glue bottle, or a foam brush....it's up to you. Stick it to a second piece of whisper white cardstock.
6. Cut out your image again. If you have a smaller image, or if you've stamped several images on a piece of cardstock, you can skip this step and just cut once at the end. I do this extra cutting with my big blossom to save cardstock (and glue!!)
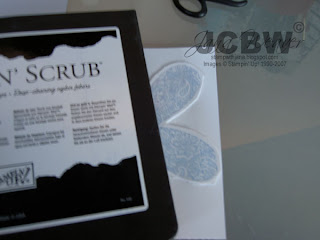
7. Repeat steps 4 and 5 again so that you have 2 layers of glue attaching 3 layers of cardstock. Put something flat (that the glue won't stick to as well, such as your Stampin' Scrub) on top of your project. Be sure whatever you use is clean or you'll get schmutz on your project (see, I'm learning German!!) Let your project set for about 20 or 30 minutes. You don't want the glue to dry, you just want it to set some. Check often though to make sure glue hasn't leaked around and attached to your "weight". Wipe any excess glue up every time you check.
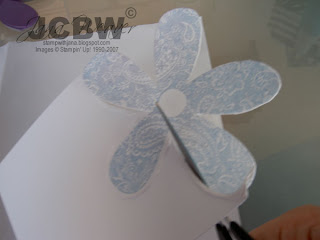
8. Now you will cut out your project for the final time. I try not to leave any white border on these flowers, but it's up to you. I DON'T recommend using your good snips for this, instead use a pair that you can dedicate to cutting sticky things! Snips or similar scissors are ideally suited for this project though because they are small. As you cut, you are effectively "sealing" the edges of the 3 layers together.

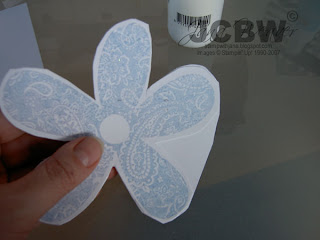
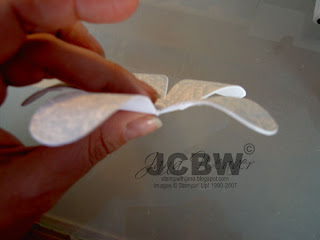
9. Now, shape your project. The extra cardstock layers and glue make it possible to bend your cardstock to give it some dimension. For flowers, I like to curve the petals up in the middle, keeping the flower center flat to the table, with the ends of the petals coming back down to the table. If you use a butterfly you can have the wings bend up some. Have fun!
10. Set your project aside (or complete the 2nd layer) and allow the glue to dry completely. If the glue is really wet when you start, you may want to reinforce your shaping every 30 minutes or so. Once dry, it should hold it's shape very well!
11. Now, apply crystal effects to your entire image. This will further set your project, protect it from damage somewhat, and add a nice gloss. You will want an even layer, spreading it around with the tip. If you use too much, it may pool down near the tips of the flower, or in the center. You can remove excess with some scrap paper or even the tip of your bottle to use elsewhere. Also, be careful not to get any air bubbles.
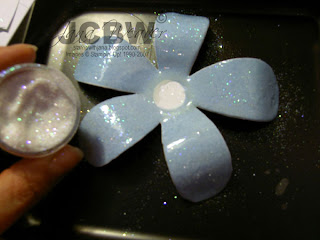
12. If you want some real shimmer and shine, sprinkle a little Dazzling Diamonds glitter while the crystal effects is still wet. I placed my blossoms in my Paper Pals tray to catch the excess glitter for reuse, then I picked up a pinch of glitter in my fingers and spread it around. If you just pour straight from the jar you'll end up with too much (and yes, you can have too much glitter although I'm sure I know of a few who would would argue that point!)
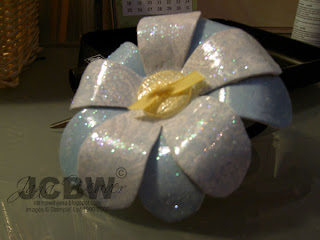
13. Finally, do any additional embellishing, and adhere the 2 layers together using crystal effects (if you are doing 2 layers.) Set it aside to dry, preferably overnight. Congratulations, your project is now complete!

 1. Gather your supplies. To complete this project you will need whisper white (or Very Vanilla) cardstock, your stamp(s) of choice (flowers, butterflies, anything you want to add dimension to!) ink, white glue, crystal effects, glitter (optional) and scissors.
 2. Stamp your images. I used Big Blossom and kissed one of them to Paisley using Brocade Blue ink (I was hoping to get a china cup look to my blossom)
 3. Cut your images out. At this point, you shouldn't cut right up to the edge, and it doesn't need to be perfect...you will be cutting them out again!
 4. Apply a liberal amount of glue to the back of your stamped image...but be careful as it is possible to have too much!
 5. Spread the glue around so that it completely covers the paper, all the way to the edges. I prefer to use my finger, but you can use the tip of the glue bottle, or a foam brush....it's up to you. Stick it to a second piece of whisper white cardstock.
 6. Cut out your image again. If you have a smaller image, or if you've stamped several images on a piece of cardstock, you can skip this step and just cut once at the end. I do this extra cutting with my big blossom to save cardstock (and glue!!)
 7. Repeat steps 4 and 5 again so that you have 2 layers of glue attaching 3 layers of cardstock. Put something flat (that the glue won't stick to as well, such as your Stampin' Scrub) on top of your project. Be sure whatever you use is clean or you'll get schmutz on your project (see, I'm learning German!!) Let your project set for about 20 or 30 minutes. You don't want the glue to dry, you just want it to set some. Check often though to make sure glue hasn't leaked around and attached to your "weight". Wipe any excess glue up every time you check.
 8. Now you will cut out your project for the final time. I try not to leave any white border on these flowers, but it's up to you. I DON'T recommend using your good snips for this, instead use a pair that you can dedicate to cutting sticky things! Snips or similar scissors are ideally suited for this project though because they are small. As you cut, you are effectively "sealing" the edges of the 3 layers together.
 9. Now, shape your project. The extra cardstock layers and glue make it possible to bend your cardstock to give it some dimension. For flowers, I like to curve the petals up in the middle, keeping the flower center flat to the table, with the ends of the petals coming back down to the table. If you use a butterfly you can have the wings bend up some. Have fun!
 10. Set your project aside (or complete the 2nd layer) and allow the glue to dry completely. If the glue is really wet when you start, you may want to reinforce your shaping every 30 minutes or so. Once dry, it should hold it's shape very well!
 11. Now, apply crystal effects to your entire image. This will further set your project, protect it from damage somewhat, and add a nice gloss. You will want an even layer, spreading it around with the tip. If you use too much, it may pool down near the tips of the flower, or in the center. You can remove excess with some scrap paper or even the tip of your bottle to use elsewhere. Also, be careful not to get any air bubbles.
 12. If you want some real shimmer and shine, sprinkle a little Dazzling Diamonds glitter while the crystal effects is still wet. I placed my blossoms in my Paper Pals tray to catch the excess glitter for reuse, then I picked up a pinch of glitter in my fingers and spread it around. If you just pour straight from the jar you'll end up with too much (and yes, you can have too much glitter although I'm sure I know of a few who would would argue that point!)
 13. Finally, do any additional embellishing, and adhere the 2 layers together using crystal effects (if you are doing 2 layers.) Set it aside to dry, preferably overnight. Congratulations, your project is now complete!
Wonderful job on the tutorial! Can't WAIT to try this one!!! Thank you SO much for putting all your time into this!
ReplyDeleteWOW this is a great tutorial! I can't wait to try this technique out. As your Diva March sister this month - I'd love one of these! Hint, hint!!! :-) Hugs, Linda
ReplyDeleteTHis is a really beautiful technique. Thanks for sharing. I have never seen this before. You did a great job.
ReplyDeleteDawn B.
This is a great tutorial. I will try this! Thank you so much for taking the time to do this!
ReplyDeleteGreat tut! Beautiful result. Gonna try it tonight. Thanks!
ReplyDeleteJana.... you ROCK girl!! This is a wonderful tutorial, thanks so much for sharing your wonderful talents and creativty!! Rubber Hugs!!
ReplyDeleteWow! So impressive!
ReplyDeleteOkay girl...first I hope your little one is now feeling a bit better. Secondly this a really great tutorial!!! You did a super job and made it so easy to follow! I really wanted to try it & now actually may do it...thanks to you!!!
ReplyDeletegreat tutorial! can't wait to try this
ReplyDeleteThis is fantastic, I can't wait to try. I also love your bunnies, they made me laugh!!
ReplyDeleteThanks so much for taking the time to post this great tutorial. Your work is awesome.
ReplyDeleteThis is GORGEOUS! Thanks for sharing!
ReplyDeleteWOW! What a beautiful flower and what a great job with the tutorial. Thanks for taking the time to post it.
ReplyDelete